In case of emergency |
In case of emergency
Even if you maintain your car in good running condition, there is always the possibility that something might go wrong and prevent you from driving, such as a punctured tire, blown fuse or bulb....
| pg. 70 | Special spare tire |
| pg. 71 | Changing a wheel |
| pg. 73 | Replacing bulbs |
| pg. 80 | Replacing fuses |
| pg. 83 | Replacing wiper blades |
| pg. 84 | Troubleshooting (Service diagnosis) |
WARNING!
|
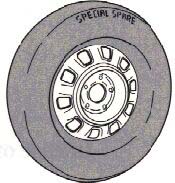
Special Spare
The spare tire of your car is what is called a "Special Spare". This is embossed on the tire. See illustration. Recommended tire pressures (see decal) should be maintained irrespective of which position on the car the Special Spare tire is used on.
In the event of damage to this tire a new one can be purchased from your Volvo dealer.
Changing a wheel
The spare wheel is located in the trunk, beneath the carpet (sedans), or beneath the rear cargo-area floor (wagons).
Before using the jack, make sure the car is standing on firm, level ground. Apply the parking brake. On models with automatic transmission place the transmission selector lever in position P. On models with manual transmission, place the gear-shift lever in 1st gear or reverse. Block the wheels standing on the ground with wooden blocks or large stones.
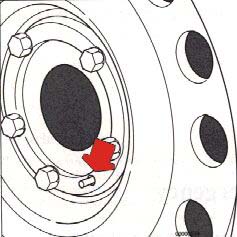
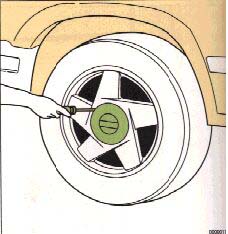
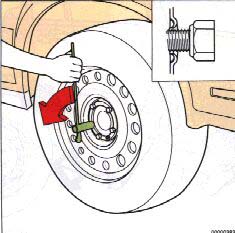
Ģ Remove the wheel cap.
Ģ With the car still on the ground, use the box wrench from the tool kit to loosen the wheel nuts 1/2 - 1 turn. Turn the nuts counterclockwise to loosen.
NOTE:
|
pg. 72 Wheel changing (cont.) |
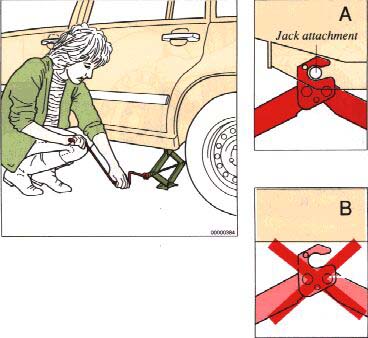
There is a jack attachment adjacent to each wheel location. Hang the jack from the attachment (alt. 1) or position the jack on the bar in the jack attachment (alt. 2) as shown in the illustration above and crank while simultaneously guiding the base to the ground. The base of the jack must be flat on a level, firm, non-slippery surface. Before raising the car check that the jack is still correctly positioned in the attachment . Now raise the vehicle until the wheel is free of the ground. Unscrew the wheel nuts completely and carefully remove the wheel so as not to damage the tread of the studs.
WARNING!
|
Installing the wheel
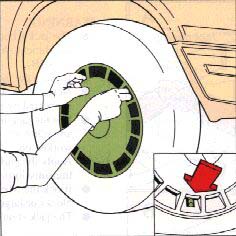
Clean the contact surfaces on the wheel and hub. Lift the wheel and place it on the hub. Make sure that you align the wheel with the guide stud on the wheel hub prior to installation. Install the wheel nuts crosswise and tighten lightly. The bevelled side of the nuts should face the wheel. Lower the vehicle to the ground and alternately tighten the nuts to 63 ft. lbs. (85 Nm). Install the wheel cap.
Some models have a hub cap that extends to the wheel rim. The valve symbol on the inside of the hub cap should be installed toward the valve. After driving for a short time, a gap of approximately 0.2" (5 mm) will develop between the wheel cover and the rim. This is normal.